
When you set up a template in isave.eDM you should plan the process carefully. It also saves a lot of time by clarifying the use of the template with the client before starting the job.
Things that should clarify with the customer:
- Layout and appearance
- Fixed elements
- Picture usage
- Language
- Available modules
Layout
When designing HTML for use in newsletters, we recommend you to forget everything you’ve learned about the newer HTML standards (use of divs and CSS classes) and go back to the HTML 1.0 standard (1996 code). This is because some e-mail clients remove CSS definitions in the top of the HTML code and the look of the newer HTML code can be displayed differently in different e-mail clients. If you consistently make use of tables with given sizes of all elements you can predict how the HTML e-mail will be shown in the individual client out there. We recommend that you make use of a test list and opens news letters in different clients before sending it out to thousands of customers. An easier way to do this is to make use of a service that generates a preview of your e-mail in the most common e-mail clients. We use the services of Email On Acid our self.
Use tables and blank GIF files to force how the HTML is shown. This is because e-mail programs use different HTML rendering engines. Some of them use Internet Explorer, Firefox, or as in the case of Outlook 2007, Microsoft Word (this creates endless challenges!).
The following is a list of elements and techniques that often creates trouble, and should be avoided:
• Background images
• Images or text that overlap
• Graphics used to build a frame around a box (see the section on Tables below)
• Flash
• Forms
• More than 2 columns next to each other (applies especially to Lotus Notes)
• Newsletters that have a width greater than 600 pixels
Tables
isave.eDM builds newsletters using tables, a grid where the layout consists of squares in different sizes and proportions. Using HTML-tables is the “old” way of building web-layouts, but is necessary to ensure maximum compatibility with e-mail clients. CSS is only safe to use when formatting text.
To create shapes, for example a box with rounded corners you need three squares (tablecells):
• One cell holds the top of the box
• A middle cell where the background is set using html.
• The bottom cell holds the rounded bottom of the box. (See the illustration)
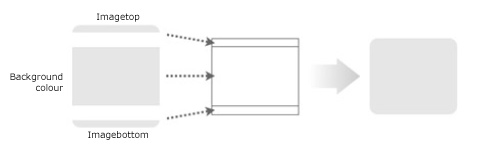
Combined these three parts (cells) make up a colored box with rounded corners. In a newsletter this box could be a separate column holding news-headings and be placed next to the main content.
When designing newsletters it is importatnt to keep in mind that e-mail clients such as Microsoft Outlook 2007 and Lotus Notes have limited support for HTML. To make sure your layout displays correctly the edges of your layout should never be made with images. This means that you should not use images (like the rounded top and bottom) to the left and right of the colored box. Artistic frames or shadow-effects should be avoided. Graphic elements should always be placed at the top or bottom of any shape or layout.
The reason why images should not be used on the sides is that the support for repeating the image when the table is extended horizontally is missing in most e-mail clients. The cell will expand when you fill it with content. Using images as backgrounds is not supported by most e-mail clients.
Should you choose to use images as borders or background, you should have in mind that this will produce unpredictable results in many e-mail clients, so be sure to test thoroughly.
Examples that work
The tables below work in all e-mail clients since they do not have graphics as right and left edges. The exception is the table on the right with a solid frame surrounding the whole table. This is created using CSS. All these tables will expand smoothly to adapt to changing content.
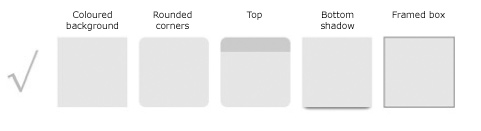
Recommended ways to build your tables.
Examples that doesn’t work
Tables with fixed height setup, to work in MS Outlook 2007 and Lotus Notes. They do not display correctly if the content makes the height change.
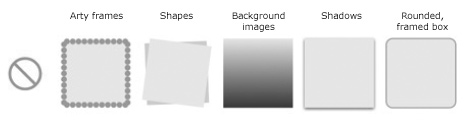
These tables are NOT recommended.
Width of the newsletter
Do not make the newsletter too wide. Most people read their e-mail in a preview pane/window which is very small even if they sit on a higher resolution screen. As a rule of thumb, we tend to say no larger than 600 pixels in width or alternatively dynamic range (100%).
Fixed elements
Put all fixed elements you want included in all mailings to the template, so you do not risk that users forget to add them (as a module) when they edit their newsletter. We recommend that logo, link to web version and a link to unsubscribe and contact information always is in the template itself.
One or more columns
The design of your newsletter will give the answer to this question (how many columns). Always remember that if you have more than one column they must be able to grow (in length) independently of each other in order to the design to work. If you have a mix of one and two columns in the newsletter, you must divide your layout further to three or more place holders for modules.
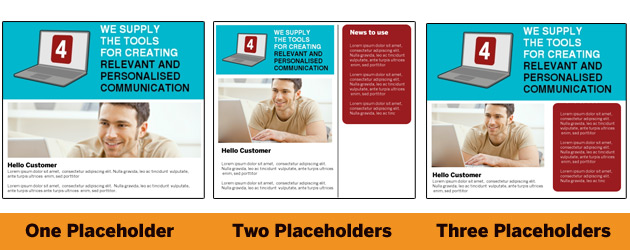
Download our generic 600 pixel wide one placeholder template here.
Download our generic 600 pixel wide two placeholders template here.
Download our generic 600 pixel wide tree placeholders template here.
Download our generic 600 pixel wide four placeholders template here.
Download our generic 600 pixel wide five placeholders template here.
Or see our separate single-column template with dynamic width here .
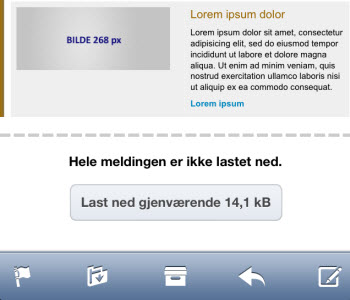
Tips for iOS
If you have an iPhone, you have probably seen this message; The entire message is not downloaded (download remaining). This bug can easily be avoided by ensuring that the HEAD tag in your HTML template contains more than 1019 characters (including spaces). By adding spaces in your code you will ensure that the entire message is downloaded on the phone to the customer..
See this example of the HEAD tag code that works on iOS.
Because iOS enlarges text to be dynamically adapted to landscape and portrait orientation, one can find that the very small text (in a footer for example) text-wraps in the tables it is placed in. This can be prevented by forcing the text to remain in the original size you have set it to by entering this code as part of the font style definition:
-webkit-text-size-adjust:none;
Download example of this code in used in our UNSUBSCRIBE module.
Tips for Microsoft Outlook
Set both the width to height definitions of placeholder spacers (blank GIF files) in your layout. If you just define the width, Outlook will automatically believe that the picture is the same height as the width and therefore you could get a completely different look in Outlook than you had expected.
If you experience a white line around a table then use this code:
Step 1. Add border-collapse value to your embedded CSS style:
table td { border-collapse: collapse; }
Step 2. Set the table border, cell spacing and cell margins to 0
<table border=”0″ cellpadding=”0″ cellspacing=”0″>
isave.DIALOG fields for modules and templates
Note that all isave specific tags should be used to get these functions to work in the newsletter:
Web version = <a href=”##WebVersion##”>Webversion</a>
Unsubscribe (from the list the newsletter is sendt to) = <a href=”##UNSUBSCRIBE##”>Unsubscribe newsletter</a>
Unsubscribe all newsletters from a company = <a href=”##UNSUBSCRIBE_ALL##”>Unsubscribe newsletter</a>
(We recommend that you use this code on a general basis).
Tell a friend = <a href=”##TELLAFRIEND##”>Tell a friend</a>
Today’s date= (##TODAYDATE##) . Will be formatted like this 26.02.2011.
Tell a friend as a image link = See this code sample
Standard fields for contacts (to add custom fields see this manual)
Name = (##Name##)
Given name = (##FirstName##)
Family name = (##LastName##)
Mobile phone = (##Mobile##)
Plus all the custom fields that are created in this client
(System / / Specifications / / Contacts).
Standard fields for newsletter templates:
Title modul = (##PLACEHOLDER_HEADER##)
Footer modul = (##PLACEHOLDER_FOOTER##)
Module Area 1 = (##PLACEHOLDER_1##)
Module Area 2 = (##PLACEHOLDER_2##)
Module Area 3 = (##PLACEHOLDER_3##)
Module Area 4 = (##PLACEHOLDER_4##)
Module Area 5 = (##PLACEHOLDER_5##) etc.
Modules and Articles
In isave we use this structure:
Templates contains module placeholders (ie: (##Placeholder_1##))
Modules contains article placeholders (ie: (##Article_1##))
Articles contains content placeholders (ie: (##Heading##))

Standard article fields:
Note that a article may only contain ONE reference of these codes per article.
Title modul = (##HEADER##)
Body text = (##BODY##)
Alternate text 1 to 8 = (##TEXT1##) to (##TEXT8##)
Image = (##IMAGE##)
Image Alt = (##IMAGE_ALT##)
Template Images [not selectable by users]= (##TEMPLATEIMAGE##)
Web link = (##URL##)
Web link text = (##URLTEXT##)
Link untitled (like image, paste the code into a text box) = (##LINKURL_XX##)
Replace XX with the ID from the link. See manual here.
RSS modul fields:
Tittel = (##RSS_TITLE##)
Description= (##RSS_DESCRIPTION##)
Publish date = (##RSS_PUBLISHED##)
RSS feed link = (##RSS_LINK##)
XML modul fields:
Text 1 to 8 = (##XML_TEXT1_XMLTAGNAME##) to (##XML_TEXT8_XMLTAGNAME##)
Replace XMLTAGNAME with the name of your xml content.
Example: (##XML_TEXT1_ProductName##) / (##XML_TEXT2_ItemNumber##) / (##XML_TEXT3_ProductInfo##)
How to set up a template in isave
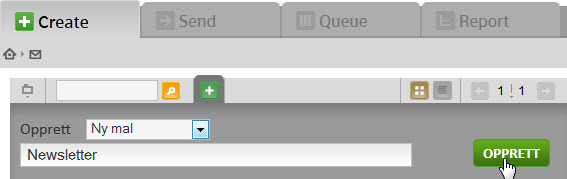
Start by creating a new eDM template.
Click the plus icon, select New Template and enter the name of the template.
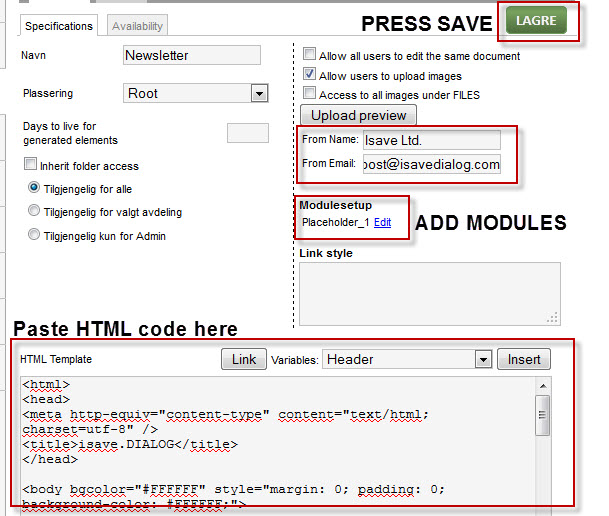
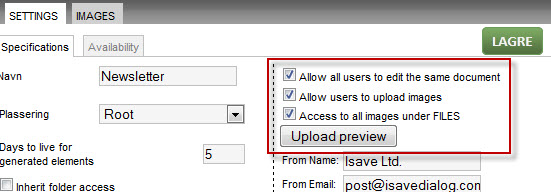
Fill in the From Name and From Email (required).

Paste the HTML code in the HTML template input area. Click the Edit button to the right of Placeholder_1 (if HTML code has several place holders, they will show up automatically here when you paste in the HTML template code). Finish by pressing Save and Close.
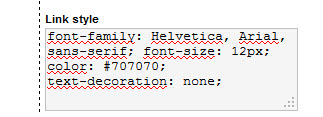
If you want to define all the links in a newsletter in a different way than standard HTML redering, use a desired Link Style in the Link Style area (do not include quotation marks in the code), as follows:
font-family: Helvetica, Arial, sans-serif; font-size: 12px; color: #707070; text-decoration: none;
You can also add CSS Link Style to your template, but this code will not show in e-mail clients that strips the head tag!
<style type=”text/css”>
a:link {font-family: Helvetica, Arial, sans-serif; font-size: 13px; color:#F19220; text-decoration:none;} /* unvisited link */
a:visited {font-family: Helvetica, Arial, sans-serif; font-size: 13px; color:#01b7cd; text-decoration:none;} /* visited link */
a:hover {font-family: Helvetica, Arial, sans-serif; font-size: 13px; color:#F19220; text-decoration:underline;} /* mouse over link */
a:active {font-family: Helvetica, Arial, sans-serif; font-size: 13px; color:#003744; text-decoration:underline; } /* selected link */
</style>
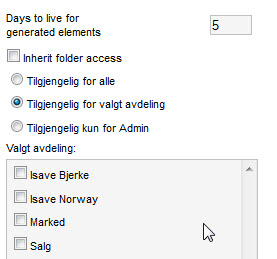
You can control the access of the template to all users, one or more departments in isave.DIALOG or only available to administrators. You can choose to automatically delete created elements created by the template after a given number of days by setting the number of days in the Days to live for generated elements input box. Note that this applies to emails that are stored in isave.DIALOG and not for the already sent emails (including web versions that customers see).
If you want everyone to be able to edit each other’s newsletter, use the setting Allow all users to edit the same document.
If you want every image folders within isave.FILES to be available for this newsletter template use the setting Access to all images under FILES
Om du vil at brukere skal kunne laste opp egne bilder setter du innstillingen Allow users to upload images
If you want to visualize the template with an image, upload a preview of the template by clicking on the button Upload Preview and browse you PC for a JPG og GIF file.
You can set the time which is the template will be available under the tab Availability.
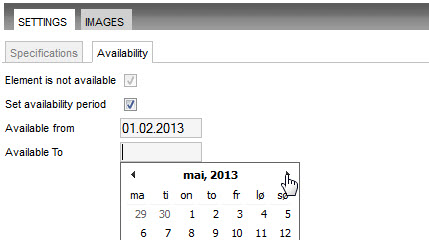
Set if the template is NOT Available by ticking the check box Element is not available
Set the period for the Available by ticking the check box Set availability period and select two dates (start and end date).
Image access
If you do not use the setting Access to all images under FILES you can choose which folders under isave.FILES that users can choose from.
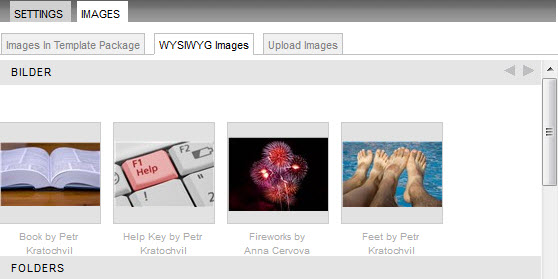
This is done by selecting the tab IMAGES and WYSIWYG Images and then tick off the folders that the customer can choose from.
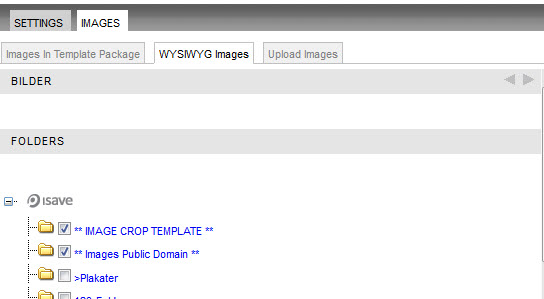
If you want to prioritize certain images or do not let an entire folder be available, click on the folder name and scroll down the page. There you can add the pictures one by clicking the Add button on the preview image.
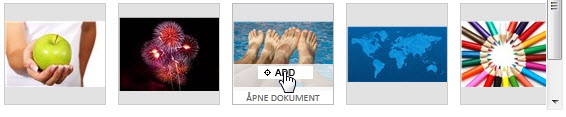
The selected images will be presented at the top under the text IMAGES.
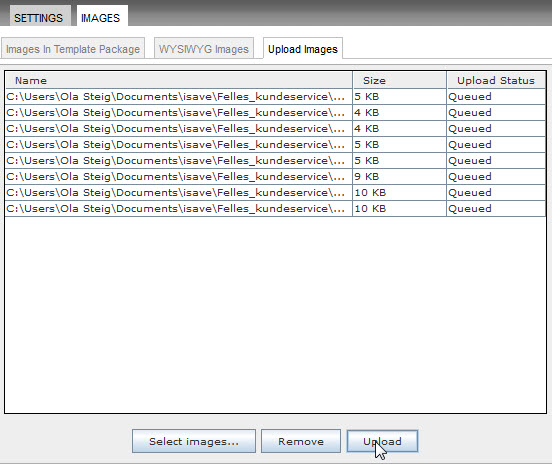
To add photos to be used by the template (logo and placeholder gif files), click on the tab Upload images and use the drag and drop method, then click the Upload button.
These images can be used in modules and templates with the following code:(##TEMPLATEIMAGE##)filnavn.gif (see sample below).
<img src=”(##TEMPLATEIMAGE##)blank.gif” height=”10″ style=”display:block;”>
 English
 Norwegian Bokmål